

HTTP Mode (hosted)
Connect any MCP-compatible client to Atoa’s hosted server. No local installation required.
NPX Mode (local)
Run the MCP server locally via
npx. Works offline and keeps credentials off HTTP.Prerequisites
Before you begin, make sure you have:- An Atoa SDK Token — follow the Getting Started guide to generate one
HTTP Mode (Recommended)
Connect any MCP-compatible client directly to Atoa’s hosted MCP server — no local installation required. Endpoint:https://mcp.atoa.me/mcp
Pass your SDK token and target environment as request headers on every connection:
AI Assistant Configuration
Most AI clients support HTTP-mode MCP connections natively. Use these configs to point your assistant directly at the Atoa MCP server.- Claude Code
- Cursor
- VS Code
Run from your terminal: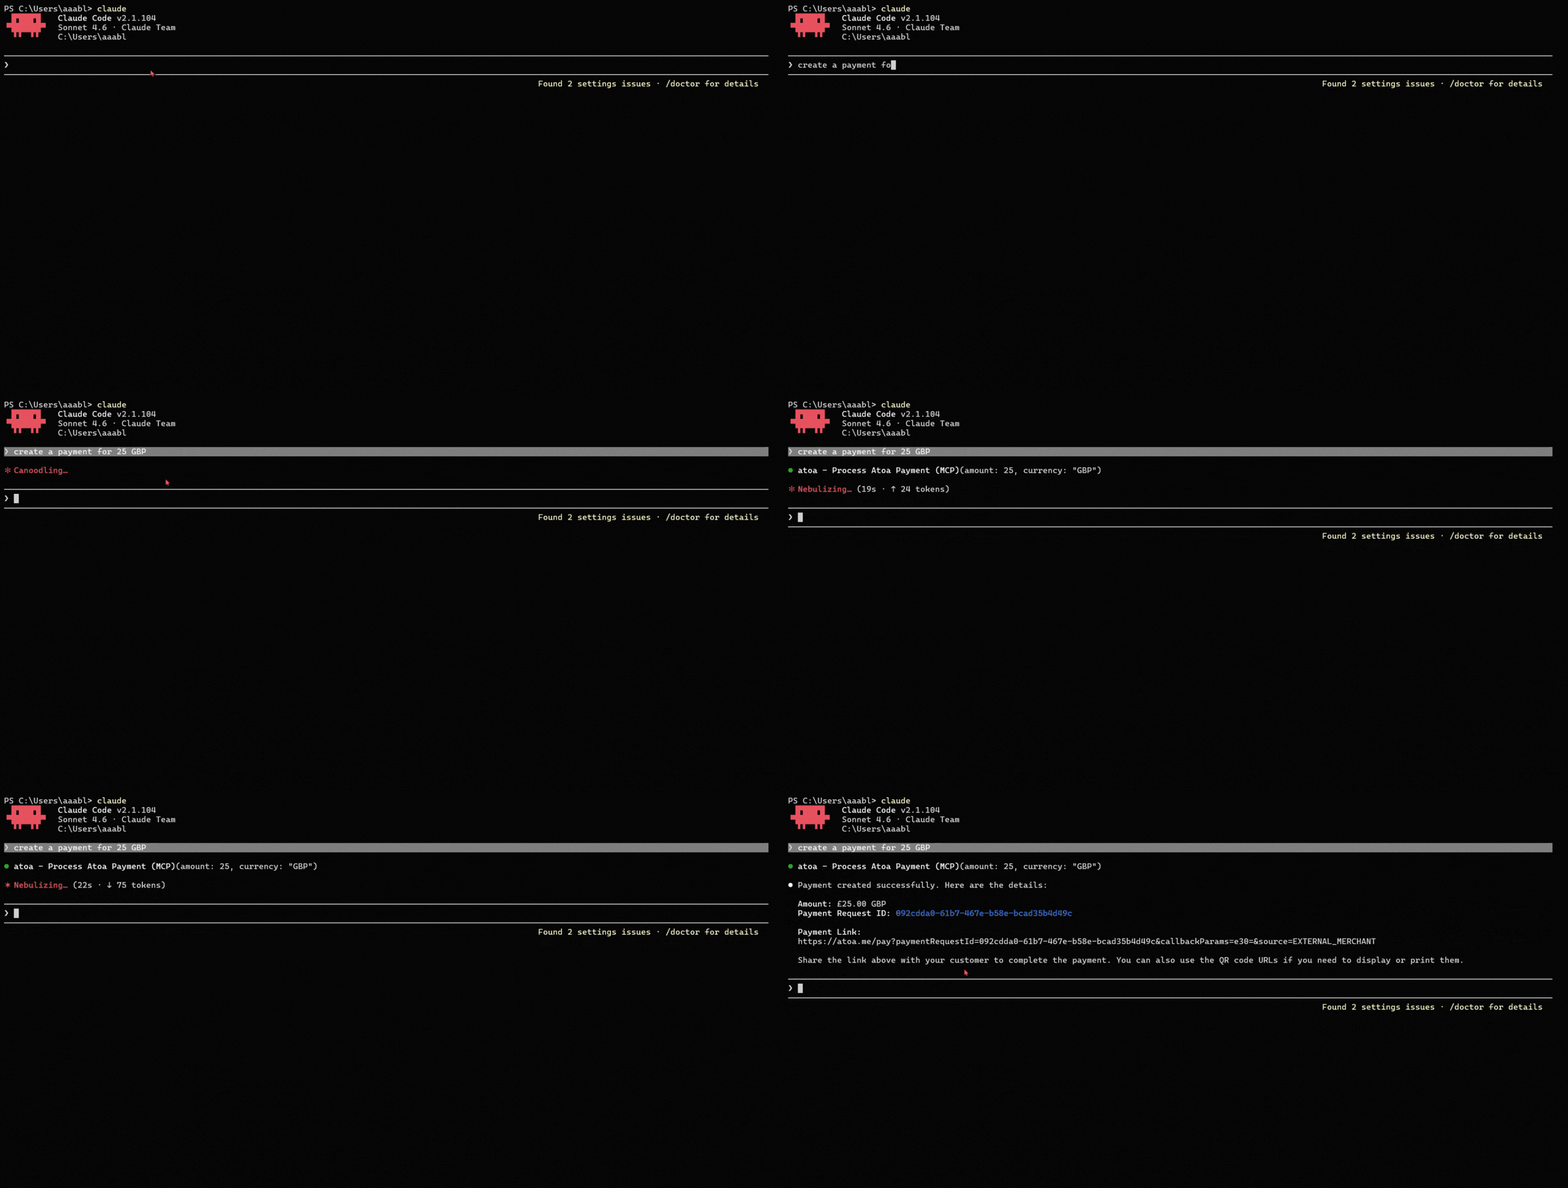
X-Atoa-Env from sandbox to production (and swap your token) when you go live.
Connecting Programmatically (MCP SDK)
For web applications and backend services, use the MCP SDK’sStreamableHTTPClientTransport:
Rate Limits
The HTTP endpoint enforces rate limiting on a per-token basis. Requests that exceed the allowed rate will receive a 429 Too Many Requests response. If this happens, back off and retry after a short delay using an exponential backoff strategy.NPX Mode (Local)
Run the Atoa MCP server locally vianpx. Use this when you prefer not to send auth headers over HTTP, need to work offline, or your AI client does not support HTTP-mode MCP connections.
Requires Node.js 18+ and npm 9+ (node --version to check).
Quick Setup
The fastest way to get started is the interactive wizard:Manual Configuration
Add the following to your AI client’s MCP configuration file:- Claude Desktop
- Cursor
- VS Code
- Gemini CLI
Edit 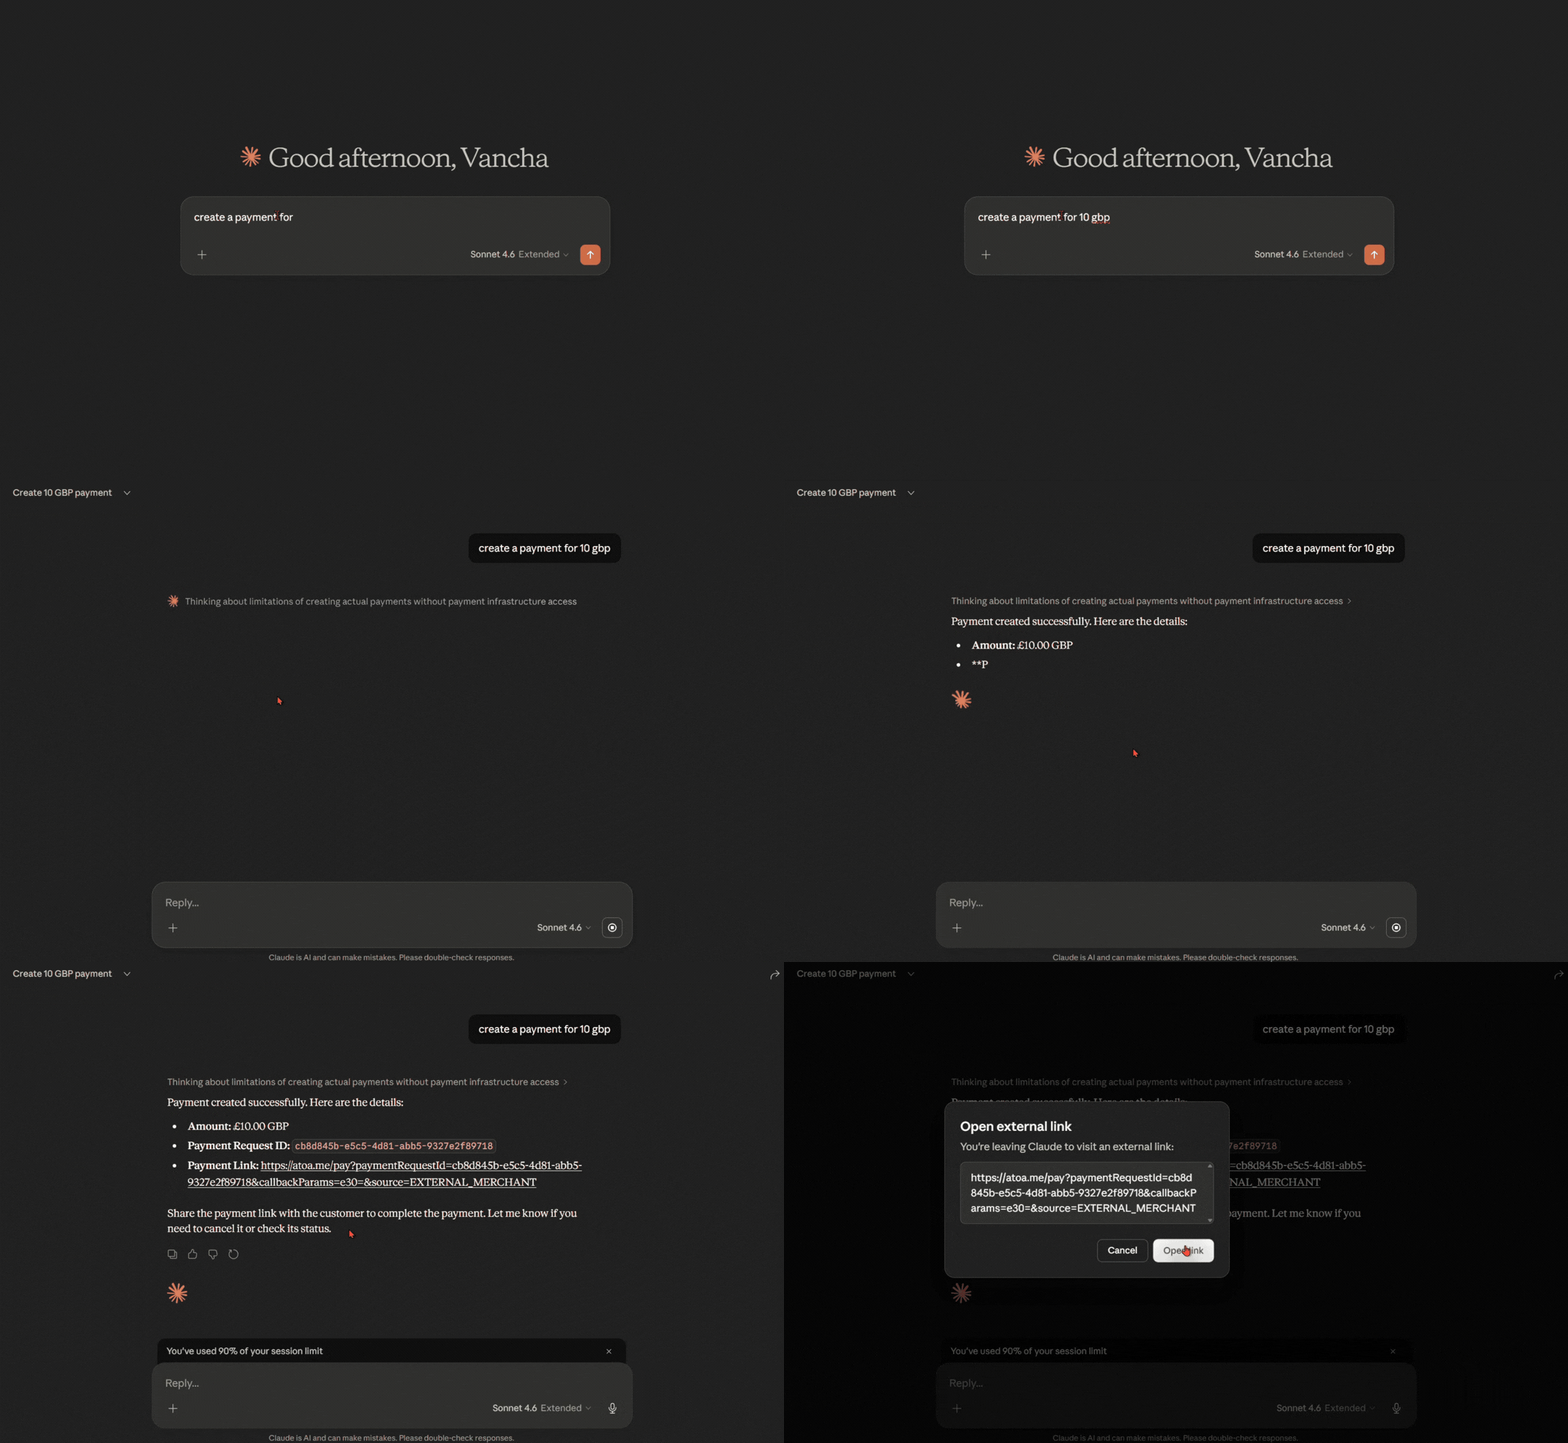
claude_desktop_config.json:- macOS:
~/Library/Application Support/Claude/claude_desktop_config.json - Windows:
%APPDATA%\Claude\claude_desktop_config.json
Passing credentials via the
env object keeps your token out of the process
argument list, which is more secure than using --auth-token CLI flags.env block:
Switch
ATOA_ENV from sandbox to production (and swap your token) when you go live.
Once configured, restart your AI client and ask:
get_stores and return your store list.
Available Tools
Browse the 29 tools below, organized into 8 categories. Click any category to expand.Payments (5 tools)
Payments (5 tools)
get_stores
List all active stores linked to your merchant account
process_payment
Create a new payment request (returns a payment link and QR code)
cancel_payment
Cancel a pending payment request
get_payment_status
Check the current status of a payment
get_transactions
Retrieve transaction history with filters (date range, status, customer)
Customers (5 tools)
Customers (5 tools)
create_customer
Register a new customer — requires either
email or phoneNumberlist_customers
List all customers with pagination
get_customer
Get details for a specific customer
update_customer
Update customer information
delete_customer
Remove a customer record
Payment Methods (3 tools)
Payment Methods (3 tools)
list_payment_methods
List saved payment methods (cards) for a customer
get_payment_method
Get details of a specific saved card
delete_payment_method
Remove a saved card
Card on File (3 tools)
Card on File (3 tools)
charge_saved_card
Charge a previously saved card — returns
AUTHORIZED, not COMPLETEDcapture_payment
Settle a pre-authorized payment (required for
MANUAL_CAPTURE)cancel_card_payment
Void a pre-authorization or unsettled card payment
Refunds (3 tools)
Refunds (3 tools)
get_refund_payments
List refunds for a given payment
initiate_refund
Start a refund for a
COMPLETED payment (full or partial)cancel_refund
Cancel an
INITIATED refund — production onlyWebhooks (3 tools)
Webhooks (3 tools)
list_merchant_webhooks
List all registered webhook endpoints
create_webhook
Register a new webhook endpoint (supports OAuth 2.0 or Basic Auth)
delete_webhook
Remove a webhook endpoint
Bank Feeds (6 tools)
Bank Feeds (6 tools)
initiate_ais_auth
Start the bank authorization flow — returns a URL the user must visit
fetch_all_accounts
List authorized bank accounts (requires completed authorization)
fetch_account_details
Get sort code, account number and bank name for an account
fetch_account_balance
Get the current balance for an account
fetch_account_transactions
Retrieve paginated transactions for an account
revoke_account_access
Revoke access to one account, multiple accounts, or an entire session
Institutions (1 tool)
Institutions (1 tool)
get_institutions
List all supported banking institutions
Some tools are guarded by your merchant’s capabilities. For example, card-on-file tools require card payments to be enabled, AIS tools require AIS bank feed access, and tipping requires tipping to be enabled. Contact
[email protected] to check which features are active on your account.Core Workflows
Create a Payment
Create a Payment
The simplest flow — create a payment link and check when it’s completed.The assistant will:Poll for completion:The assistant calls
- Call
get_storesto resolve your default store - Call
process_paymentwithamount: 25, currency: "GBP" - Return a
paymentLinkandqrCodeUrlyou share with the customer - The customer opens the link or scans the QR code to pay via their bank app
amount must be a positive number with no more than 2 decimal places (e.g.,
25.99 ✅ — 25.999 ❌). Currency defaults to "GBP".get_payment_status and returns one of:Save a Customer's Card and Charge It Later
Save a Customer's Card and Charge It Later
This two-step flow saves a card during a regular payment, then charges it in future without the customer re-entering details.Step 1 — First payment (saves the card)The assistant calls Step 2 — List saved cardsThe assistant calls The assistant calls The assistant calls
process_payment with savePaymentMethod: true and atoaCustomerId: "cust_abc123". After the customer completes the payment, their card is stored.atoaCustomerId is required when savePaymentMethod is true. The
customer must exist first — create them with create_customer if needed.list_payment_methods and returns the saved cards with masked numbers.Step 3 — Charge the saved cardcharge_saved_card with:Step 4 — Capture (MANUAL_CAPTURE only)
capture_payment with the paymentRequestId from step 3.Refund a Payment
Refund a Payment
initiate_refund. Key constraints:- Payment must be in
COMPLETEDstatus — pending, expired, or cancelled payments cannot be refunded - Partial refunds are supported —
amountmust be ≤ the original payment amount - The refund goes through as
INITIATED→PENDING→COMPLETED(orFAILED) - To cancel an
INITIATEDrefund before it processes, usecancel_refund— production only
Sandbox: To simulate a failed refund, call
initiate_refund with
refundNotes: "FAILURE TEST". Use this to test your error-handling paths —
cancel_refund is not available in sandbox.Register a Webhook
Register a Webhook
Webhooks notify your server when payment or refund statuses change.The assistant calls
create_webhook with:You can create one webhook per event type. Register separate webhooks for
payment status and refund status if you need both.
Troubleshooting
'Merchant not found' or 401 error
'Merchant not found' or 401 error
Your auth token is invalid, expired, or mis-formatted. Check:
- Get a fresh token from the Atoa Dashboard
- HTTP mode: confirm the
Authorizationheader isBearer YOUR_TOKEN(with a space afterBearer) and theX-Atoa-Envheader matches your token type (sandboxorproduction) - NPX mode: confirm
ATOA_AUTH_TOKENandATOA_ENVare set correctly in theenvblock of your config - Sandbox tokens and production tokens are not interchangeable — ensure you are using the right one for each environment
Tools not appearing in my AI assistant
Tools not appearing in my AI assistant
- Restart your AI client after updating the config file — most clients load MCP config only on startup
- Verify the config file path and key name match your client (see the config tabs above)
- NPX mode: check Node.js version —
node --versionmust be 18+ - NPX mode: run the server manually to see errors:
npx @atoapayments/mcp
fetch_all_accounts returns empty or errors after initiate_ais_auth
fetch_all_accounts returns empty or errors after initiate_ais_auth
The user must complete the bank authorization before this tool works. After calling
initiate_ais_auth:- Share the
authorizationUrlwith the user - Wait for them to approve access in their banking app
- Only then call
fetch_all_accountswith the returnedaccountAuthId
initiate_refund fails with 'payment not eligible'
initiate_refund fails with 'payment not eligible'
Refunds require the payment to be in
COMPLETED status. Check the payment
status first with get_payment_status. You cannot refund a PENDING,
EXPIRED, CANCELLED, or FAILED payment.'cancel_refund' fails in sandbox
'cancel_refund' fails in sandbox
This is expected —
cancel_refund only works in production. To test refund
cancellation paths in sandbox, call initiate_refund with refundNotes: "FAILURE TEST" to simulate a failure instead.Tool returns 403 'capability not enabled'
Tool returns 403 'capability not enabled'
Some tools require specific features to be enabled on your merchant account. For example:
- Card-on-file tools (
charge_saved_card,capture_payment,cancel_card_payment) require card payments - AIS / Bank Feed tools require AIS bank feed access
- Tips on
process_paymentrequire tipping to be enabled
[email protected] to check which capabilities are active or to enable additional features.Store not found
Store not found
The
get_stores tool only returns active stores. If a store is disabled
in your Atoa Dashboard, it won’t
appear. Enable the store in the dashboard and retry.Connection timeout or unreachable
Connection timeout or unreachable
If you experience timeouts connecting to
https://mcp.atoa.me:- Check your internet connection
- Verify no firewall rules are blocking outbound HTTPS (port 443)
- Check Atoa Status for service incidents
Too many requests (429)
Too many requests (429)
The HTTP endpoint enforces rate limiting per token. If you receive a
429 response:- Wait briefly before retrying the request
- Space out sequential tool calls
- If you consistently hit rate limits for a production use case, contact
[email protected]
Need Help?
Contact our team at[email protected] or use chat support on the Dashboard.